You walked into your game room on a Tuesday night, friends canceled last minute, and there's that air hockey table just sitting there. You've had plenty of two-player matches, but you've never really thought about practicing alone. Here's the thing: knowing how to play air hockey alone is one of the most underrated ways to level up your game fast. If you're serious about improving at one of the most competitive table games in any game room, solo practice is where the real work happens.
Air hockey is built on three pillars: shot accuracy, defensive positioning, and reaction speed. You can train all three on your own. Solo sessions strip away the noise of competition so you can zero in on exactly what needs work. No opponent means you control every variable — pace, drill type, repetitions, and focus area.
Think about how players improve at other solo-friendly table games. If you've read our guide on how to practice pool by yourself, you already know the principle: structured solo sessions beat casual play for building real skill. The same logic applies here. Give yourself a clear plan before you step up to the table, and you'll walk away a noticeably sharper player every time.
Contents
From Rookie to Regular: Understanding Where You Stand
Honest Self-Assessment
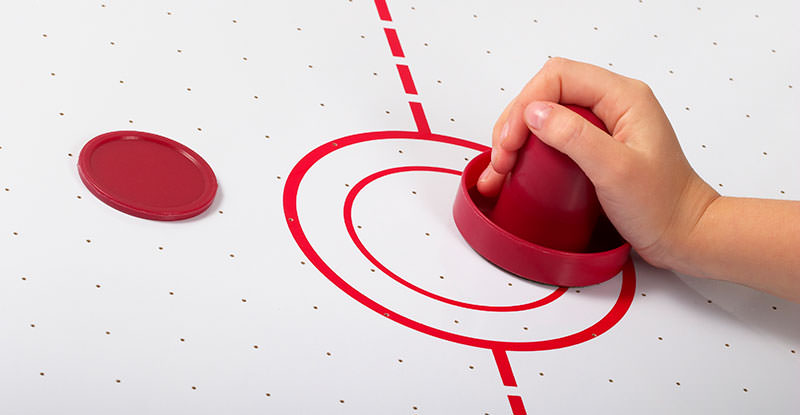
Before you practice, you need to know what you're actually working on. Most casual players share the same gaps: they shoot from the same spot every time, they panic on defense, and they chase the puck instead of anticipating it. Sound familiar? That's your starting point, and recognizing it is the first productive thing you'll do.
Beginners should focus on consistent puck control — keeping the puck moving in a predictable pattern rather than just smacking it around. Once you can reliably guide the puck along the rail and redirect it without losing control, you've cleared the first real threshold. If you're still fuzzy on the basic framework of the game, review the official air hockey rules before diving into drills.
The Solo Skill Ladder
Think of solo practice as a four-stage progression. At Stage 1, you're getting comfortable with the mallet and learning how the puck behaves across different parts of the table. Stage 2 is drilling specific shots — straight shots, bank shots, cuts. Stage 3 is stringing shots together with intention. Stage 4 is simulating match pressure by setting self-imposed goals, like landing five consecutive bank shots before stopping a drill.
Players who skip Stages 1 and 2 never develop real shot consistency. They feel fine in casual games but fall apart against anyone who plays with purpose. Don't skip the boring fundamentals. They're what everything else builds on.
Start every session with five minutes of slow, deliberate puck-rail drills. Rushing into power shots before you've warmed up is the fastest way to reinforce bad mechanics.
How to Structure a Solo Air Hockey Session
Getting Set Up Right
Turn on the blower and let the table run for a full minute before you start. A fully pressurized surface makes the puck behave correctly — skimming rather than dragging. Check that your mallet grip is comfortable and neutral. You want your hand relaxed, not white-knuckling the handle before you've even started.
Set a time limit before you begin — 20 to 30 minutes is ideal. Without a limit, sessions drift into unfocused puck-chasing, which builds bad habits rather than corrects them. Keep a notebook or use your phone to log what you worked on and where you struggled. Players who track their sessions improve faster. It's the same discipline serious table tennis solo practitioners use, and it transfers directly to air hockey.
The Core Drills
Use the table below to plan your sessions. Rotate through these drills based on your weakest area that day. Don't try to run all six in a single session — pick two or three and execute them with intention.
| Drill Name | Focus Area | Duration | Difficulty |
|---|---|---|---|
| Rail Glide | Puck control along the wall | 5 min | Beginner |
| Straight Laser | Center-line power shots | 5 min | Beginner |
| Corner Bank Shots | Angle accuracy | 5–8 min | Intermediate |
| Cut Shot Sequence | Diagonal redirection | 8 min | Intermediate |
| Rebound Defense | Puck recovery from your own end | 5–10 min | Advanced |
| Pressure Simulation | Consistency under self-imposed goals | 10 min | Advanced |
The Rail Glide and Straight Laser drills are where beginners should spend the majority of their time. Once you can execute both cleanly and consistently, add Corner Bank Shots to your rotation. Don't move to advanced drills until the intermediate ones feel automatic — that's not a suggestion, it's the only path that actually works.
Mistakes That Stall Your Progress
Bad Habits at the Table
The biggest mistake players make during solo practice is treating it like a warm-up rather than real training. They hit the puck, watch it bounce, hit it again — no goal, no structure, no feedback loop. That's not practice. That's just occupying the table.
Another common error is only drilling your dominant side. If you're right-handed, your right-side shots are probably already decent. The drills that will genuinely improve your game are the uncomfortable ones on your weaker side. Intentional discomfort is the mechanism of improvement, and avoiding it means you're only practicing what you already know.
You'll also notice that most solo players set up too far back from the center line. Position yourself closer to the goal you're shooting into during accuracy drills, then increase the distance as consistency improves. This mirrors how serious players in other precision games approach training — something you'll recognize if you've ever read up on pinball tips for building shot accuracy.
Grip and Stance Errors
Your mallet grip should stay loose throughout a session. A tight grip reduces your reaction time and limits your wrist range on deflections. Stand with your feet shoulder-width apart and your weight slightly forward. Don't lock your knees. A rigid stance makes you slow, and slow means giving up easy shots every time the puck changes direction unexpectedly.
If your forearm gets tired during a solo session, your grip is too tight — loosen up and let the mallet do the work instead of your arm muscles.
What You've Heard About Solo Practice That Isn't True
Myth: Solo Play Is Boring and Pointless
This is the most common reason people skip solo sessions, and it's simply wrong. Boredom during solo practice is a sign that you don't have a structured plan — not that solo practice itself doesn't work. Players who approach the table with specific drills and session goals find the time goes fast. Games like darts have built entire solo practice cultures around this principle. If you've browsed fun darts games to play by yourself, you've already seen how structure transforms solitary play into something genuinely engaging.
Solo practice is also where you build the muscle memory that makes you dangerous in actual matches. Match play reinforces whatever habits you already have, good or bad. Solo practice is where you actually change those habits.
Myth: Air Hockey Is Too Simple to Practice Alone
People who say this have never watched a competitive air hockey match. The game has real depth — angle calculations, defensive zones, shot fakes, puck speed management. Every shot type has a specific mechanical execution that takes deliberate repetition to master. You don't get there by playing two-player matches on weekends.
Consider how much depth exists in other classic table games that look simple from the outside. The evolution of table tennis shows how a game that seems straightforward at first glance can support decades of serious competitive development. Air hockey is no different. Picking up a mallet and hitting a puck doesn't mean you're actually playing the game well.
Tactics That Actually Build Better Skills
Shot Types to Master
When you practice how to play air hockey alone, concentrate on three shot types before anything else. The straight shot is the foundation — a clean, direct hit down the center lane. The bank shot uses the rail to redirect the puck at an angle your opponent won't anticipate. The cut shot is a diagonal redirect from the side of the table that crosses the center line sharply and catches defenders out of position.
Mastering these three gives you the framework for every other shot in the game. Practice each in isolation before you start combining them into sequences. When you can transition between shot types without thinking about the mechanics, you're ready to start simulating match scenarios during your sessions.
Other table game communities have proven that single-skill isolation transfers to full-game performance. If you've looked into billiards games you can run solo, you've seen the same pattern play out: isolate the skill, drill it until it's automatic, then integrate it into full play.
Reading the Table
Every air hockey table has its own character. Some have faster blowers, some have rails that bank at unexpected angles, some have dead zones near the corners where the airflow is weakest. Spend part of your solo sessions mapping your specific table. Hit the puck from five different positions and watch exactly how it rebounds off each rail.
This knowledge compounds over time. When you know your table better than your opponent does, you gain a real advantage in every match you play on it. That's not luck — that's the direct payoff from structured solo practice done consistently.
Frequently Asked Questions
Can you actually improve at air hockey by practicing alone?
Yes. Solo practice lets you focus on specific mechanics — shot accuracy, bank angles, and puck control — without the distraction of reacting to an opponent. Players who use structured solo drills consistently develop stronger fundamentals than those who only play two-player matches.
How long should a solo air hockey session last?
Twenty to thirty minutes is the sweet spot. Sessions shorter than 15 minutes don't give you enough time to warm up and drill effectively. Sessions longer than 45 minutes tend to drift into unfocused play, which reinforces bad habits rather than fixing them.
What drills are best for beginners playing air hockey alone?
Start with the Rail Glide and Straight Laser drills. Both build fundamental puck control and shot consistency. Once you can execute those cleanly, add corner bank shots to your rotation. Build the foundation before moving to cut shots or advanced pressure simulations.
Do I need any special equipment to practice solo?
No special equipment is required. A standard air hockey table with a working blower, a regulation mallet, and a puck are all you need. Make sure the blower runs at full pressure before you start so the puck behaves the same way it would in a real match.
Is solo air hockey practice useful for competitive players?
Absolutely. Competitive players use solo sessions to refine specific weaknesses between matches — particularly shot placement and defensive recovery positioning. Solo practice is where you can repeat a single move fifty times in a row, which is simply not possible in a live game.
How do I practice defense when playing air hockey alone?
Work on the Rebound Defense drill: shoot the puck into your own goal area, then practice recovering it cleanly before it crosses the goal line. This builds the quick-read instincts and mallet positioning you need to block incoming shots in a real match.
Can kids practice air hockey by themselves?
Yes. Solo air hockey practice is excellent for younger players because it removes competitive pressure and lets them build confidence at their own pace. Start with simple straight shots and rail guides, then introduce bank shots once basic control is comfortable.
How is playing air hockey alone different from a two-player match?
In solo practice you control the pace entirely, which lets you isolate and fix specific mechanics. In a match, you're reacting to an opponent's moves in real time. Solo practice builds the mechanical foundation; match play tests and applies it. You need both for real improvement.
Next Steps
- Review the complete air hockey rules so you have a clear picture of the game's structure before you start drilling specific shots.
- Set up your first structured solo session using the drill table in this guide — run Rail Glide and Straight Laser for the first two sessions before adding anything else.
- Log every session: note which drills you ran, how many repetitions, and where you struggled most. Review those notes before the next session begins.
- Once you're consistent on beginner drills, add Corner Bank Shots and Cut Shot Sequences to your rotation and set measurable goals — for example, eight out of ten bank shots landing clean before you move on.
- After four weeks of structured solo practice, challenge yourself in a live match and compare your shot confidence and defensive instincts to where you started.


About Mike Jones
Mike Jones grew up in the golden age of arcade and home gaming — a childhood shaped by Atari classics like Pitfall, Frogger, and Kaboom that gave him a lifelong appreciation for games of all kinds. These days he covers the full breadth of tabletop and family gaming: board games, card games, yard games, table games, and game room setup, with a particular focus on finding the games that bring different groups together. At GamingWeekender, he covers game reviews, buying guides, and recommendations for families, friends, and hobbyists who take their leisure seriously.
You can get FREE Gifts. Or latest Free phones here.
Disable Ad block to reveal all the info. Once done, hit a button below